Share GPU resources between VMs, LXCs and machines on the network
I put together a very flexible, straightforward and scalable workflow to share GPU compute and VRAM resources between LXCs and VMs.
So here are my notes on how to share a GPU (or multiple GPUs) between LXCs and VMs for computational and rendering tasks on a single host. Without GPU passthrough. Without using outdated GPUs with VDI (Virtual Desktop Infrastructure) NVIDIA GRID aka vGPU, that would require requesting a driver license (or running the script with a hack) with an expiration date from NVIDIA. Without SR-IOV. Without need for disabling VDI GRID 60fps frame limiter for running rendering (gaming) tasks. Without any tricks to bypass code 43 error when NVIDIA driver detects that it’s inside a VM. Without the trickery (nothing wrong with that) of changing the registry entry in Windows to make it use a high performance GPU for rendering and another GPU for video output. Without installing NVIDIA drivers in the Windows vm at all.
the end result:
a PMVE host with GPU(s) that is running NVIDIA drivers, unprivileged LXC container(s) with nvidia container toolkit and docker (with a docker container running Juice server), Windows VM(s) with GPU-over-IP rendering on the host GPU(s), and/or desktop streaming to another machine. or a computer on the same network with Juice client for GPU-over-IP rendering/inference/traning tasks.
GPU choices and why I do not use vGPU:
- GRID only supports Maxwell, Pascal, Volta, and Turing
- Ampere, Ada Lovelace and newer GPUs are not supported by GRID
- the need to request a time-limited license from NVIDIA
my GPU of choice for training, rendering and gaming:
- enterprise or consumer GPUs on Pascal architecture and newer. NVIDIA P40 in my case
why I chose this method:
straightforward deployment, reproducibility, no hacks, less possibilities for making a mistake
scalability: the same workflow supports any NVIDIA GPU, from Kepler to the newest Blackwell 2.0
usecases:
multiple research teams running training or inference (over ssh) on the same GPU(s) but in isolated environments of different LXCs
a rendering task/game on a Windows laptop without a dedicated GPU is running using GPU-over-IP on the same LAN
run inference tasks on a GPU in an LXC container and game/rendering on the same GPU in a Windows VM at the same time
GPU-over-IP within the same hypervisor:
remote rendering tasks: a headless windows vm, run an application that requires rendering acceleration using GPU-over-IP with Juice client. Juice server is running in a docker container with nvidia runtime within an LXC on the same host, so network throughput is not an issue.
a vm that is connected to an HDMI display through another GPU, running gaming/rendering tasks using GPU-over-IP as above.
same as above, but with desktop streaming using Sunshine server and Moonlight client on another device.
setup overview:
install proxmox host, install nvidia drivers on the host. follow proxmox setup
create an LXC container, install nvidia drivers in the LXC. follow GPU LXC setup and docker LXC setup it will be a template for a
GPU LXC. it is not necessary to convert it to an actual template, just clone it later making a unique MAC address and ID.clone a
GPU LXC, install nvidia-container-toolkit, install docker, switch docker to nvidia runtime. it will be a template for adocker LXCcreate any number of LXC containers by cloning
docker LXC(for GPU-accelerated docker containers) orGPU LXC(for running training or inference tasks using CUDA)deploy docker stack that includes the Juice server (for GPU-over-IP) and other local services in one of the
docker LXCexamples of using GPU-over-IP on a Windows VM:
for a headless Windows VM, for use with noVNC viewer in proxmox, install SPICE guest tools, set the display device to
Vir-GL GPUorSPICEin vm settings for higher resolution (cycle settingsenable tablet for pointerif the mouse pointer is out of sync). For RDP, enable remote desktop and connect from a Linux (using Remmina), Windows (mstsc) or MacOS (MSRDP) client machine. then install Juice client and edit juice.cfg. start the vm, run an app that needs a GPU withjuicifycommand.for using Windows VM with HDMI output, pass through another GPU (can be old and/or slow) to the VM, in the VM settings change display to None. the passed GPU must be isolated from the driver on the host based on GPU ID using
options vfio-pci ids=in/etc/modprobe.d/vfio.conf. pass through a bluetooth controller and pair a keyboard and a mouse, or pass through a usb device directly if using wired controllers. disable sleep after inactivity. start an application withjuicifycommand.for desktop streaming from Windows VM, same as above, another GPU (again, can be old and/or slow) is needed, but only for hardware video encoding this time. A dummy plug must be installed into the HDMI port. install Sunshine server, set it up in the Sunshine webui. start an app that needs rendering acceleration or a game with
juicifycommand. on a client device (Windows, Linux, iOS, etc), install Moonlight client and connect to the Moonlight server. press Ctrl+Shift+Alt+Q on Moonlight PC to quit the streaming session.
Windows VM config in Proxmox:
cat /etc/pve/qemu-server/106.conf
headless (for any rendering task except gaming):
1
2
3
4
5
6
7
8
9
10
11
12
13
14
15
16
17
18
19
20
21
22
23
agent: 1
bios: ovmf
boot: order=ide2;scsi0;ide0;net0
cores: 8
cpu: host,flags=+pcid
efidisk0: local-lvm:vm-106-disk-0,efitype=4m,pre-enrolled-keys=1,size=4M
ide0: local:iso/virtio-win-0.1.240.iso,media=cdrom,size=612812K
ide2: none,media=cdrom
machine: pc-q35-9.0
memory: 16384
meta: creation-qemu=9.0.2,ctime=1735736288
name: win
net0: e1000=BC:24:11:CC:04:18,bridge=vmbr0
numa: 0
ostype: win11
scsi0: local-lvm:vm-106-disk-1,discard=on,iothread=1,size=128G,ssd=1
scsihw: virtio-scsi-single
smbios1: uuid=86459dee-bdda-4946-b442-cbb6b8a26d73
sockets: 1
tablet: 1
usb0: host=0a12:0001,usb3=1
usb1: host=1209:4f54,usb3=1
vga: qxl
with HDMI output (low latency, high refresh rate):
1
2
3
4
5
6
7
8
9
10
11
12
13
14
15
16
17
18
19
20
21
22
23
24
25
26
agent: 1
bios: ovmf
boot: order=ide2;scsi0;ide0;net0
cores: 8
cpu: host,flags=+pcid
efidisk0: local-lvm:vm-106-disk-0,efitype=4m,pre-enrolled-keys=1,size=4M
hostpci0: 0000:03:00.0,pcie=1,x-vga=1
hostpci1: 0000:03:00.1,pcie=1
ide0: local:iso/virtio-win-0.1.240.iso,media=cdrom,size=612812K
ide2: none,media=cdrom
machine: pc-q35-9.0
memory: 16384
meta: creation-qemu=9.0.2,ctime=1735736288
name: win
net0: e1000=BC:24:11:CC:04:18,bridge=vmbr0
numa: 0
ostype: win11
scsi0: local-lvm:vm-106-disk-1,discard=on,iothread=1,size=128G,ssd=1
scsihw: virtio-scsi-single
smbios1: uuid=86459dee-bdda-4946-b442-cbb6b8a26d73
sockets: 1
tablet: 1
usb0: host=0a12:0001,usb3=1
usb1: host=1209:4f54,usb3=1
vga: none
vmgenid: b0b899e0-630c-4ede-9eaa-f81fbcd4765f
desktop streaming setup
in the Windows VM: install https://github.com/LizardByte/Sunshine
- navigate to http://localhost:47990/ to setup Sunshine server
on a client: install https://moonlight-stream.org/, set up connection to 192.168.19.221 port 47989, use the code from the Sunshine server webui. client must have a physical GPU that supports hardware video decoding.
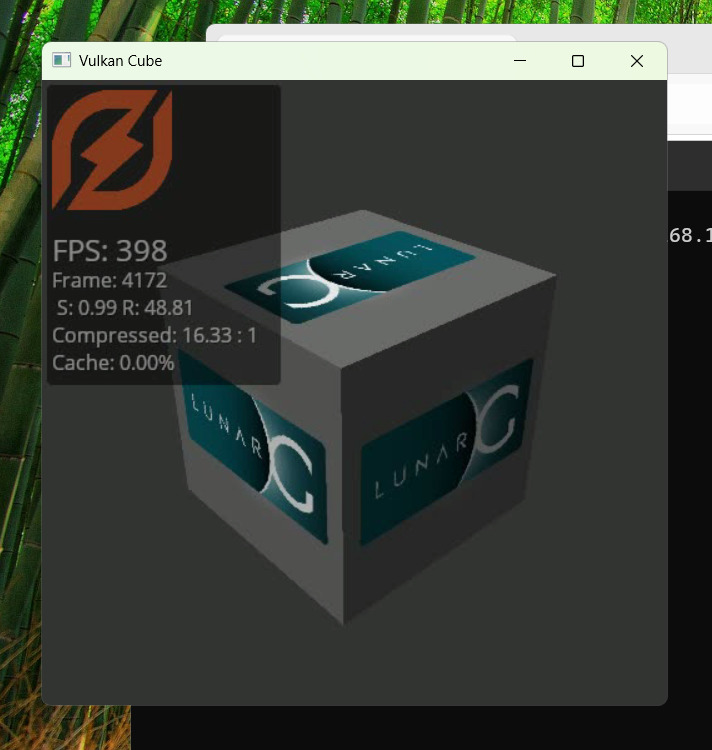
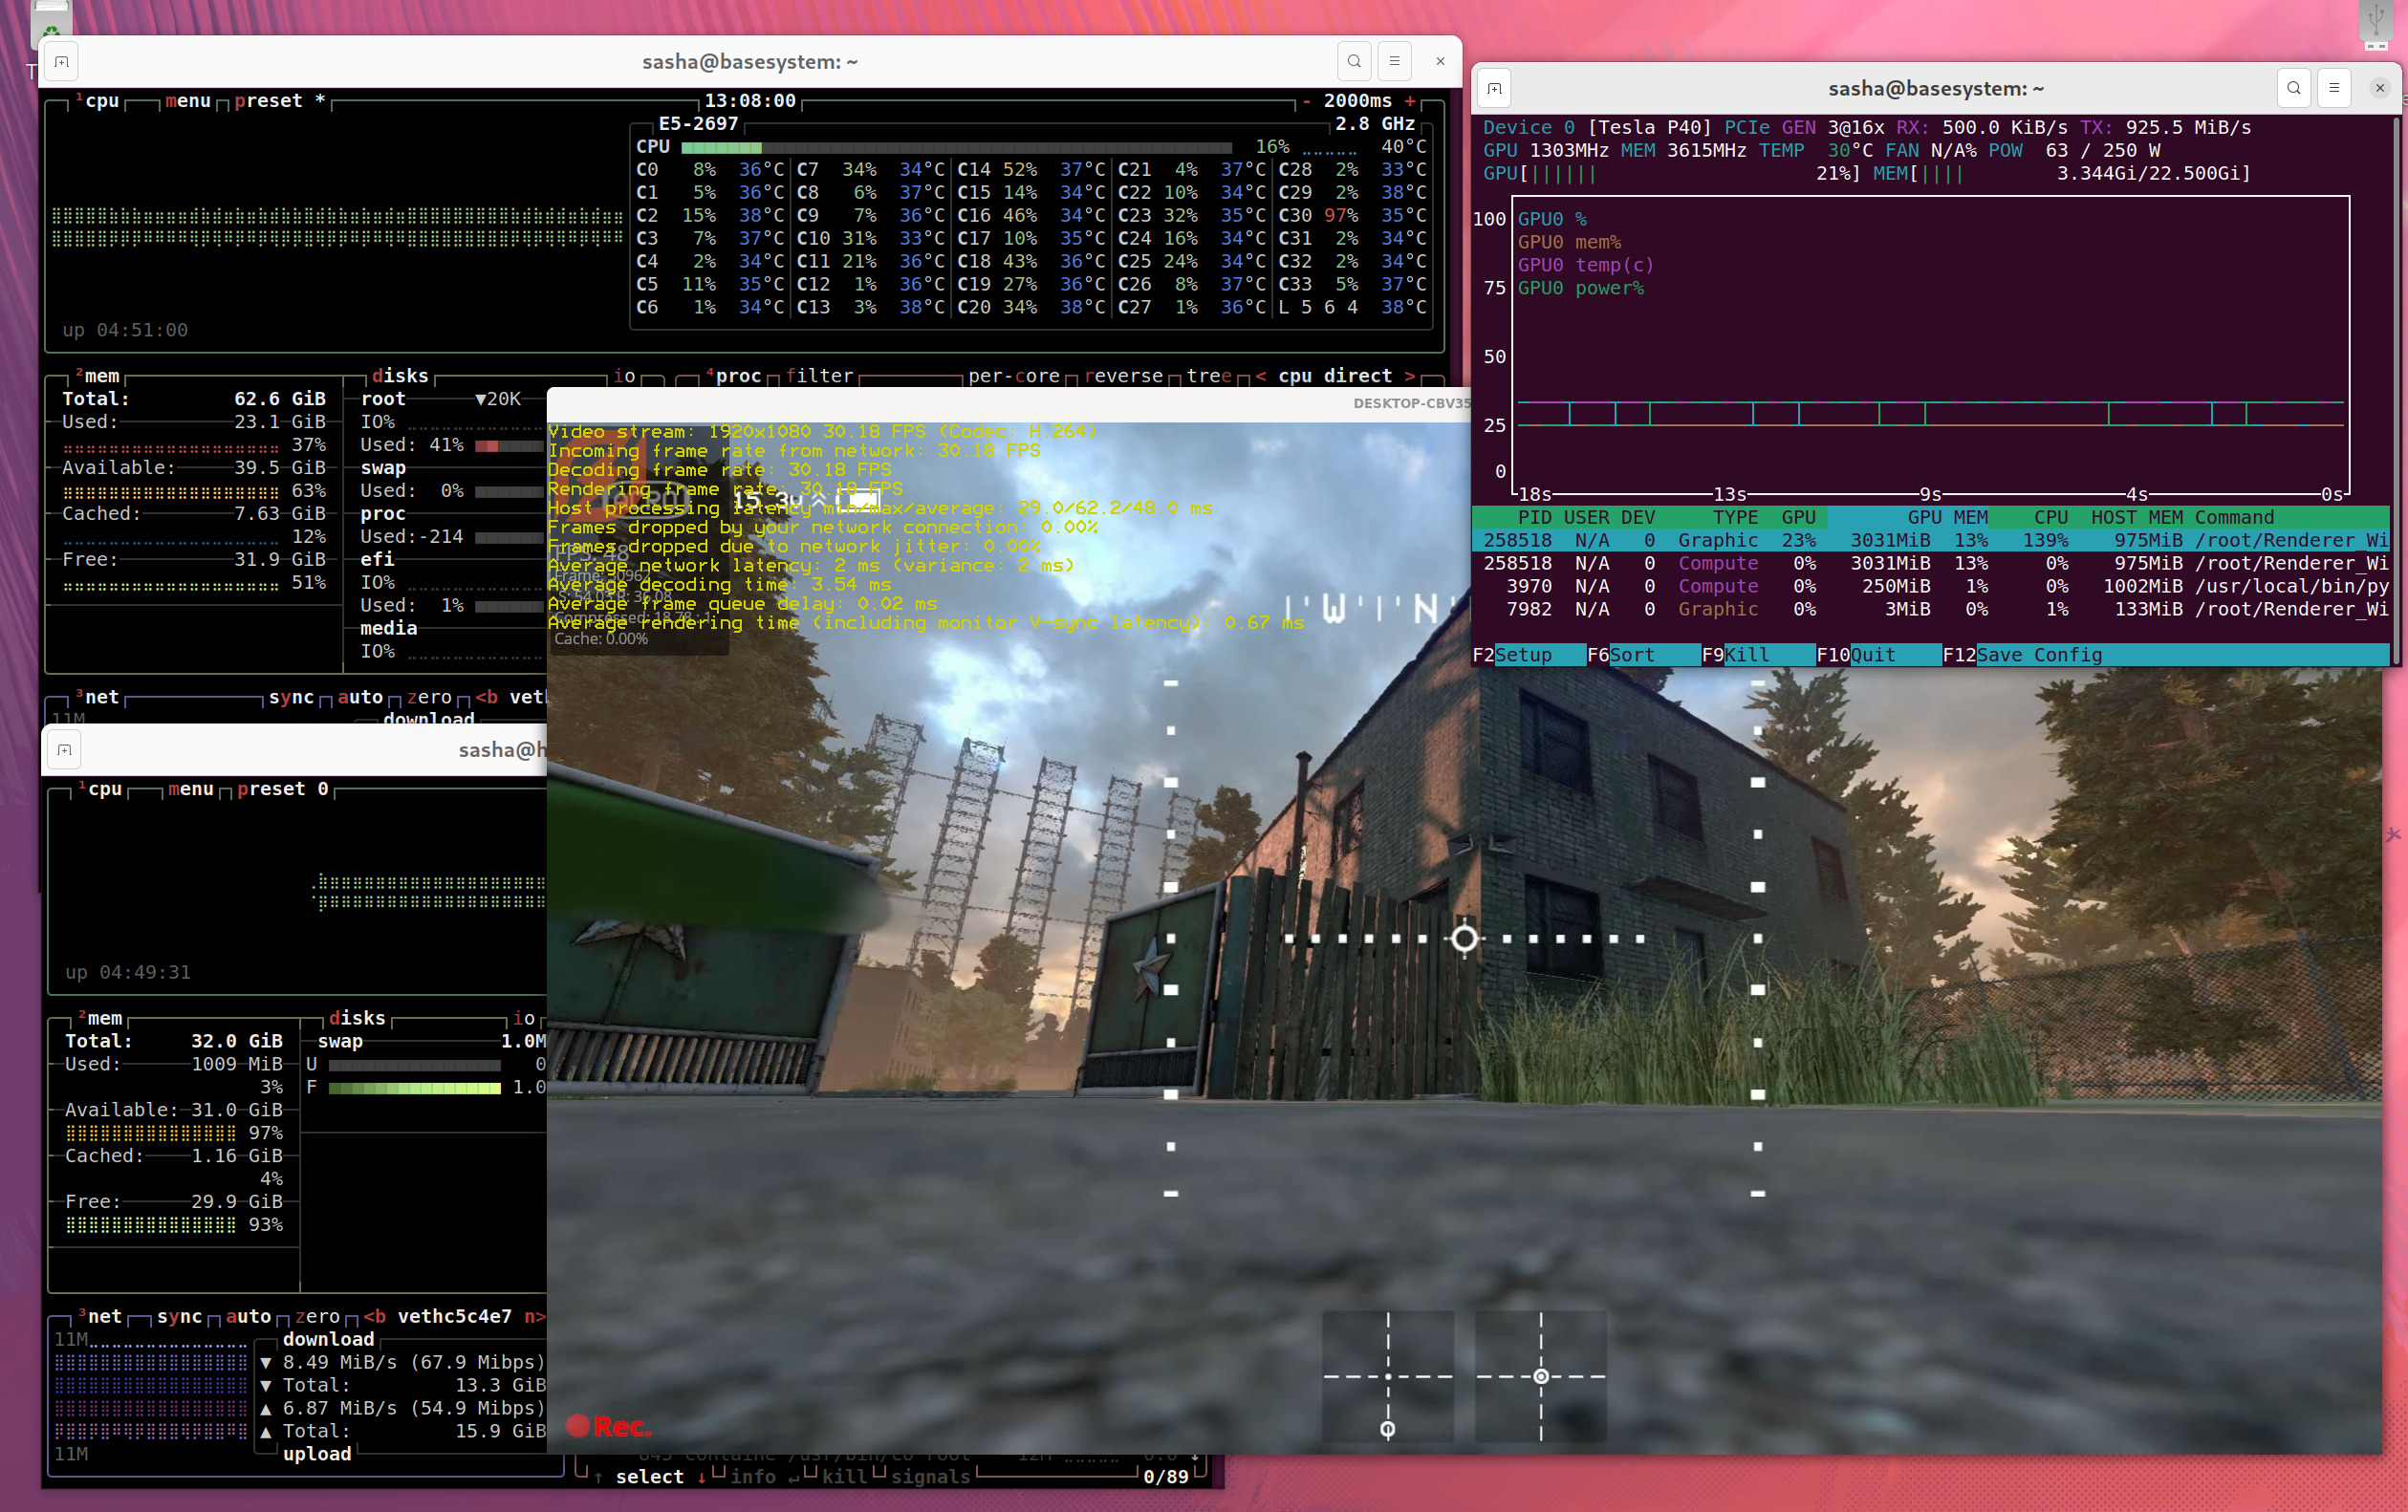
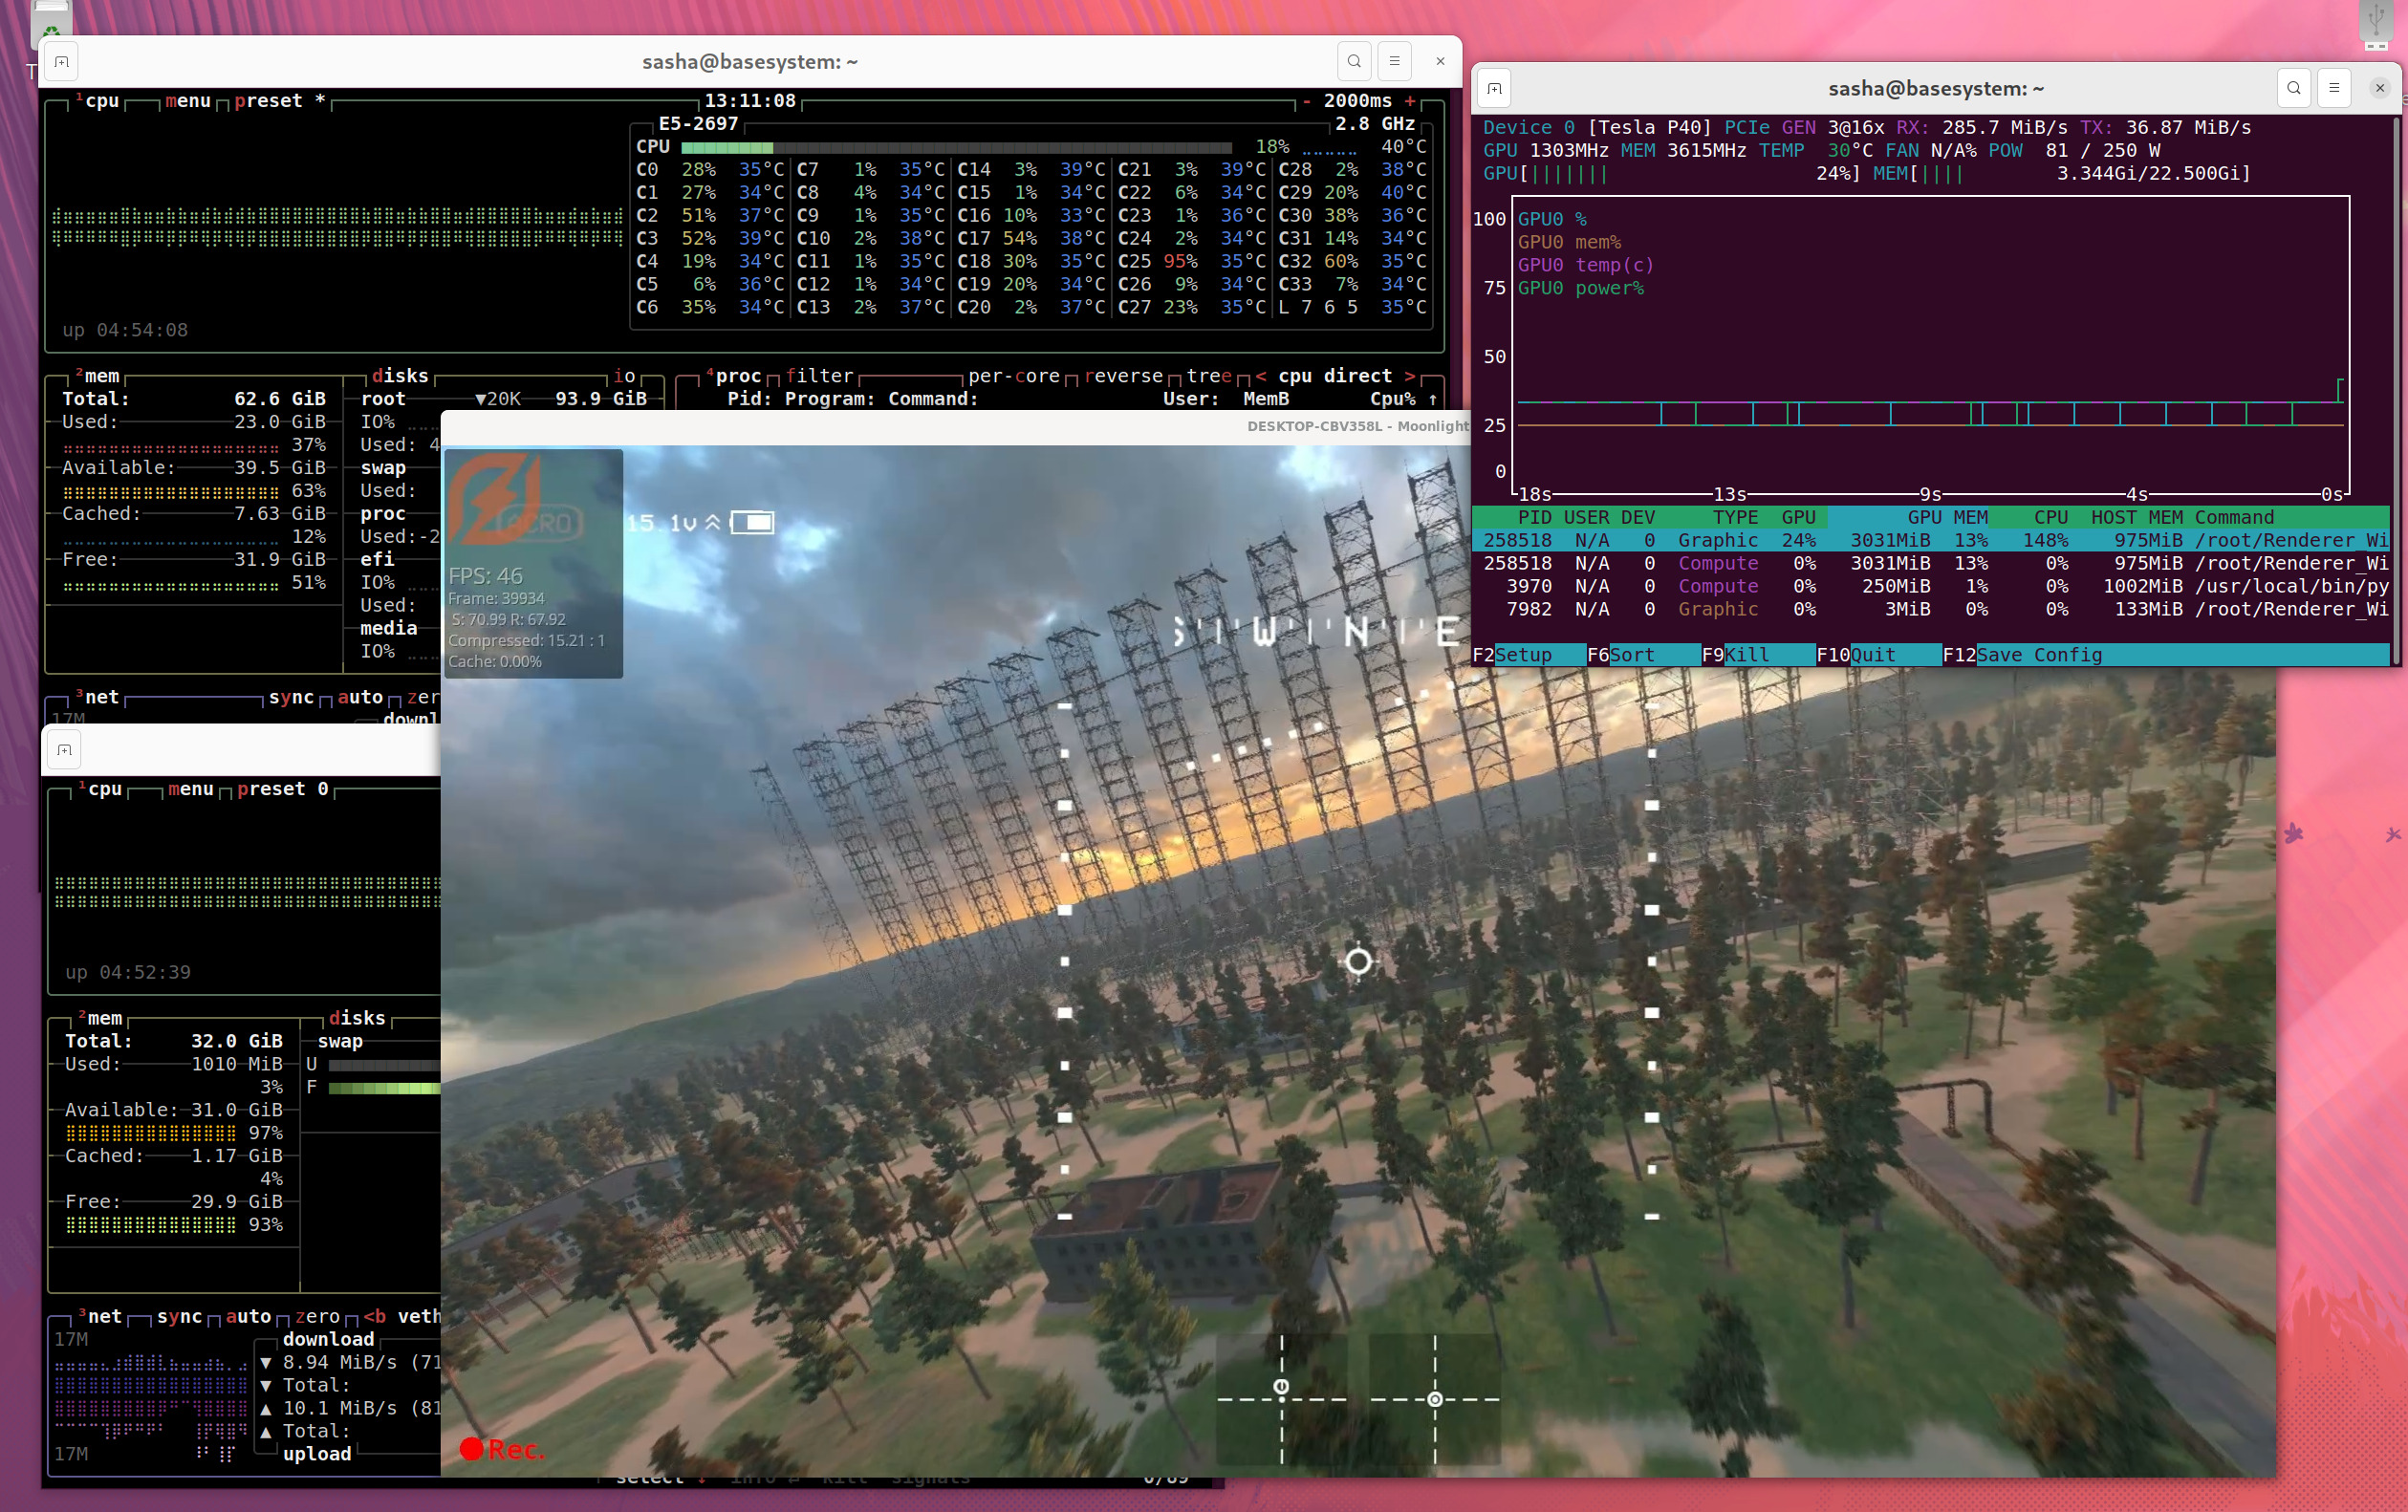
benchmark of GPU-over-IP rendering:
on the Windows VM (using NVIDIA GT730 for HDMI output) with a GPU-over-IP rendering on a NVIDIA P40 GPU in a LXC container on the same host:
running Vulkan Cube
running Liftoff as an example of a rendering task

same vm, but streaming desktop using Sunshine server and Moonlight client for Linux. Hardware video encoding with NVIDIA GT730 on the server and software video decoding on the client.
references:
- https://www.youtube.com/watch?v=jTXPMcBqoi8&list=PLGbfidALQauKNWMqrVXGd63aa9EcevFn9&index=1
- https://pve.proxmox.com/wiki/Windows_10_guest_best_practices#Drivers_and_Services
- https://pve.proxmox.com/wiki/SPICE
- https://forum.proxmox.com/threads/windows-resolution-issue.86687/
- https://forum.proxmox.com/threads/windows-11-vm-for-gaming-setup-guide.137718/
- https://www.youtube.com/watch?v=AYDnGeqvwAA
- https://github.com/moonlight-stream/moonlight-docs/wiki/Setup-Guide#using-moonlight-to-stream-your-entire-desktop